
Achieving a showroom-quality finish on your vehicle requires more than just a quick wash and wax. Professional car polishing techniques elevate your vehicle's appearance to new heights, delivering that enviable deep gloss that turns heads. When executed correctly, these methods not only enhance visual appeal but also provide lasting protection for your paintwork investment. Let's explore how to achieve professional results, even for enthusiastic home detailers.
Mastering surface preparation fundamentals
The foundation of exceptional car polishing begins with meticulous preparation. According to car care specialists at Kammann Automobile, the preparation stage is arguably the most critical factor determining the quality of your final finish. Many enthusiasts make the mistake of rushing to the polishing stage without properly preparing the surface, which can lead to disappointing results and potentially damage the paintwork.
Thorough cleaning and contaminant removal methods
Before any polishing can begin, your vehicle requires comprehensive cleaning to remove all surface contaminants. This involves a two-bucket washing method using pH-neutral car shampoo to prevent swirl marks during cleaning. Industry experts note that approximately 90% of paint scratches actually occur during improper washing rather than general use. After washing, a thorough rinse followed by drying with clean microfibre towels prevents water spotting which can interfere with the polishing process.
Clay bar treatment and chemical decontamination essentials
Even after washing, microscopic contaminants remain embedded in the paint surface. Clay bar treatment physically removes these stubborn bonded contaminants that washing alone cannot eliminate. Glide the lubricated clay across small sections of the paintwork until the surface feels smooth as glass. For more stubborn contamination like industrial fallout or embedded brake dust, chemical decontaminants specifically formulated for automotive use break down these particles for easier removal. This crucial step ensures the polishing compounds can work directly on the paint surface rather than against trapped contaminants.
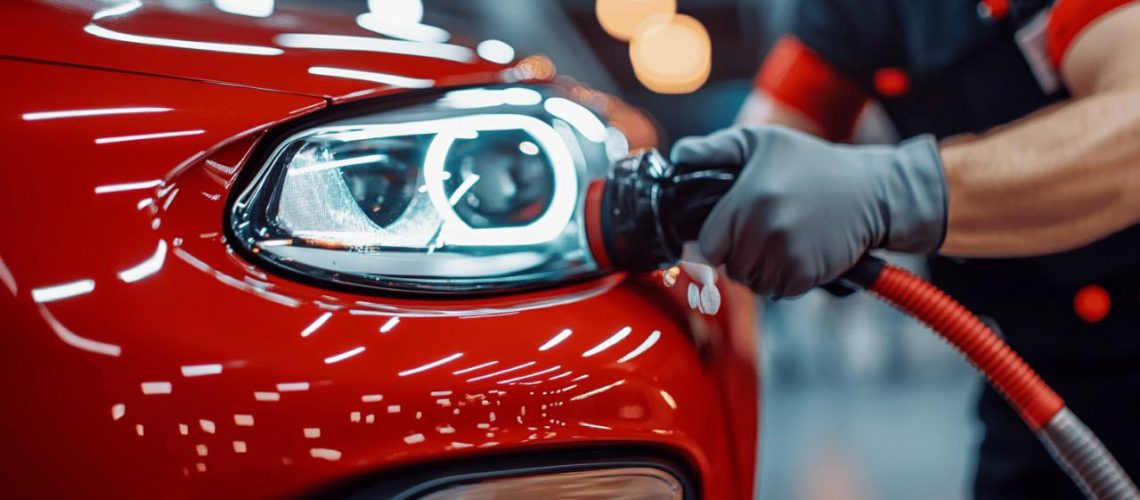
Understanding professional polishing equipment
The right tools make all the difference between amateur and professional results. Machine polishing delivers superior outcomes compared to hand polishing due to its consistency, efficiency and ability to generate the controlled heat needed to properly work compounds into the paint.
Selecting quality machine polishers and appropriate pads
Professional detailers typically use dual-action polishers which offer a balance between correction ability and safety for beginners. These machines rotate and oscillate simultaneously, reducing the risk of burning through paint or creating holograms. The pad selection is equally important and should be matched to your correction goals. Cutting pads with firm foam structure remove deeper defects while finishing pads with softer composition deliver maximum gloss. Specialists from Killer Brands, with their 24 years of experience in car care products, recommend starting with a medium-cut pad for versatility when beginning your polishing journey.
Choosing the right compounds for different paint conditions
Polishing compounds vary in abrasiveness and finishing capabilities. For heavily scratched or oxidized paint, aggressive cutting compounds like Autobrite Direct Ultra Cut effectively remove deeper imperfections. For light swirl marks or as a finishing step, products like Autobrite Enrich provide gloss enhancement with minimal cut. Modern compounds like Correct and Protect offer dual functionality, removing surface defects while incorporating SiO2 protection. The paint condition, hardness, and your correction goals should guide your compound selection. Always start with the least aggressive option that will address your specific issues.
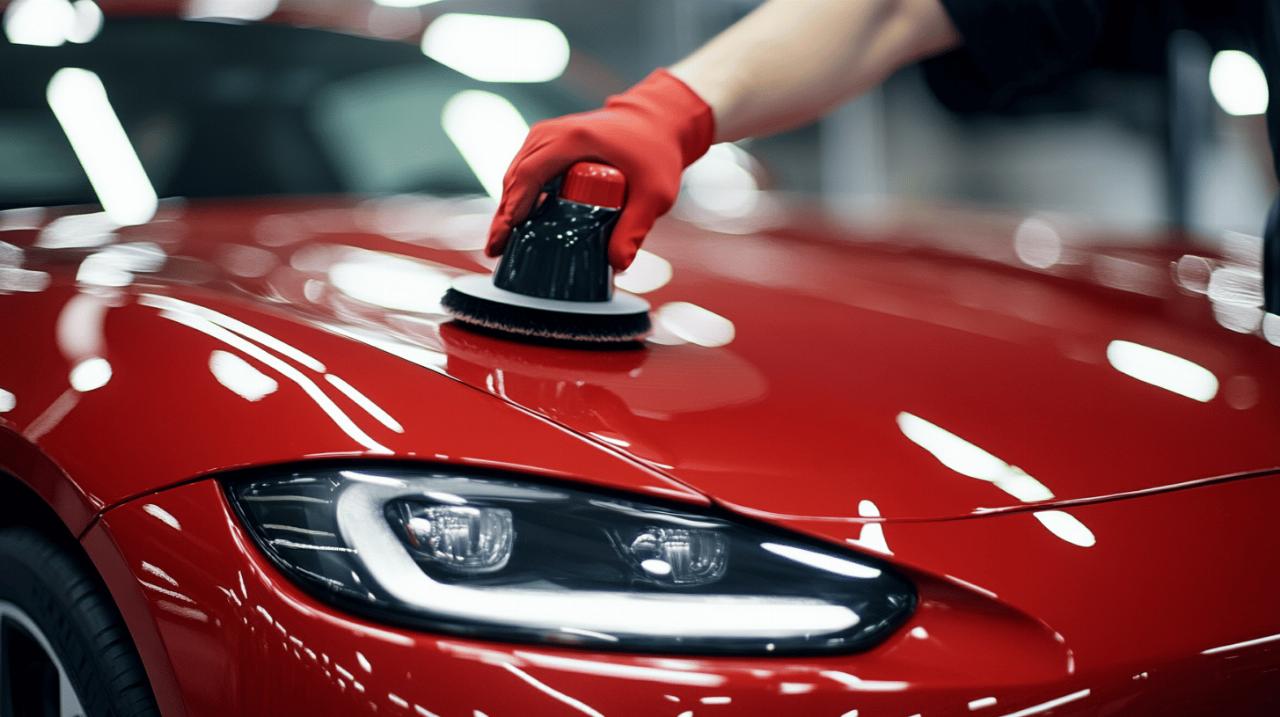
The art of multi-stage polishing
Professional results typically require a strategic multi-stage approach rather than attempting to achieve perfection in a single step. This methodical process allows for targeted correction while minimizing the amount of clear coat removed during the process.
Cutting stage techniques for defect removal
The initial cutting stage focuses on removing the most significant paint defects such as scratches, swirls, and oxidation. During this phase, work in small sections approximately 60cm square using slow, controlled movements. The compound breaks down as you work, becoming progressively finer. Automotive detailing experts recommend using medium speed settings and allowing the weight of the machine to provide pressure rather than forcing the tool against the paint. Multiple passes may be necessary for deeper defects, but patience during this stage establishes the foundation for exceptional results.
Refining and finishing stages for maximum gloss
After defect removal comes the refining stage, which eliminates any micromarring left from the cutting process. This step transitions to finer compounds and softer pads, focusing on enhancing gloss rather than correction. The finishing stage requires exceptionally light pressure and slower machine speeds to bring out maximum reflectivity and depth. Professional detailers often use diminishing abrasive polishes that break down from fine to superfine during use, leaving an incredibly smooth surface. This multi-stage approach requires patience but delivers the mirror-like finish that distinguishes professional work.
Perfecting machine polishing techniques
 The effectiveness of your polishing compounds and equipment ultimately depends on your technique. Mastering the fundamentals of machine control separates amateur results from professional outcomes.
Speed, pressure and movement control
Machine speed should vary according to the stage of polishing. Higher speeds around 4-5 on most dual-action polishers suit cutting stages, while refining and finishing benefit from slower 2-3 speed settings. Pressure should remain light to moderate, allowing the machine to do the work rather than forcing results. Movement control requires maintaining a steady pace, neither rushing nor dwelling too long in one area. Professional detailers develop a rhythm of consistent movement that ensures even correction across panels without creating hot spots or uneven removal.
Section work patterns and overlap strategies
Working in a systematic pattern ensures complete coverage without missing areas. The crosshatch method involves polishing in horizontal passes, then following with vertical passes over the same section. Each section should overlap the previous by approximately 50% to ensure consistent results. For curved panels, adjust your technique to maintain consistent pressure despite the changing surface angle. This methodical approach takes longer but delivers superior, hologram-free results that reflect your attention to detail.
Protective finishing treatments
After achieving your desired level of correction and gloss, protecting your work becomes paramount. The final protective layer shields your freshly polished paint from environmental contaminants and UV damage.
Paint sealant application methods
Synthetic paint sealants offer durable protection that can last 6-12 months with proper maintenance. Application techniques vary by product, but most require thin, even coats applied to cool panels out of direct sunlight. Allow the recommended curing time before buffing off with clean microfibre towels. Some modern sealants incorporate SiO2 technology similar to ceramic coatings, providing enhanced chemical resistance and water beading. For maximum protection, apply sealant in overlapping straight lines, ensuring complete coverage of all painted surfaces.
Premium wax layering for depth and longevity
While sealants excel at protection, premium carnauba waxes add unmatched depth and warmth to your finish. Many professionals apply wax over sealant in a technique known as layering. This approach combines the durability of synthetic protection with the visual enhancement of natural waxes. Allow each layer to fully cure before applying subsequent coats. Most carnauba waxes benefit from 2-3 layers with 12-24 hours between applications for optimal bonding. This investment in protection preserves your polishing work and extends the time between major correction sessions.
Maintaining your polished finish
The effort invested in professional polishing deserves equally attentive maintenance. Proper care routines dramatically extend the life of your polished finish and protective layers.
Safe washing practices after polishing
Maintain your polished finish by adopting safe washing practices that minimize the risk of introducing new swirls. Use pH-neutral shampoos specifically formulated for automotive finishes and separate wash mitts for different areas of the vehicle. The two-bucket method with grit guards prevents contaminants from being reintroduced to the paint surface. For especially soiled vehicles, consider a pre-wash foam application to loosen dirt before physical contact. Drying should utilize plush microfibre towels or air blowers rather than chamois, which can introduce marring.
Periodic maintenance schedules for sustained brilliance
Establish a regular maintenance schedule including weekly washing, monthly protection top-ups, and quarterly inspections for any new defects requiring spot correction. Quick detailers and spray waxes between washes help maintain protection levels and remove light contamination before it can bond to the paint. For vehicles stored outdoors, consider more frequent protection refreshing, particularly after extreme weather events. With diligent maintenance, your professionally polished finish can retain its brilliant appearance for years, showcasing your commitment to automotive excellence and preserving your vehicle's value.